


This post may contain affiliate links. If you book through them, I may earn a small commission at no extra cost to you. I only recommend personally curated options that make sense for cruise passengers and independent travellers.
How to photograph the Forth Bridge? Short answer: the hour before sunset, or full dark if you want the easiest exposure. Everywhere else on this page changes by the minute — here’s why.
Most advice on photographing the Forth Bridges points you somewhere specific, then tells you to shoot. There you are, standing on the Hawes Pier staring up at the immense steel structure of the rail bridge. Then you check the photos on your smartphone, and they somehow haven’t captured the scale of the red cantilever bridge.
That’s the wrong assumption many visitors to South Queensferry make. They think photographing the Forth Bridges is all about getting the right positions. But here’s what happens. Midday sun flattens the steel. Choppy water kills scale. Phones exaggerate none of it.
The frustration sends cruise ship passengers, tourists, and day trippers walking, shooting, zooming – repeating the same flat frame. Here’s what many people miss – conditions on the Firth of Forth can change the mood of an entire frame in minutes. A bit earlier, a bit later, and you’ve got a completely different picture to share.
This isn’t a location list. It’s a local read on when photo opportunities to capture the forth bridges work and when they don’t. Photographing the Forth Bridges becomes easier once you understand light, water, weather, and patience – the parts most visitors don’t factor in.
Already know where you’re standing? The best viewpoints in Queensferry covers the specific spots — this page is about what happens once you’re there: light, weather, and timing.
Timing Beats Position Every Time
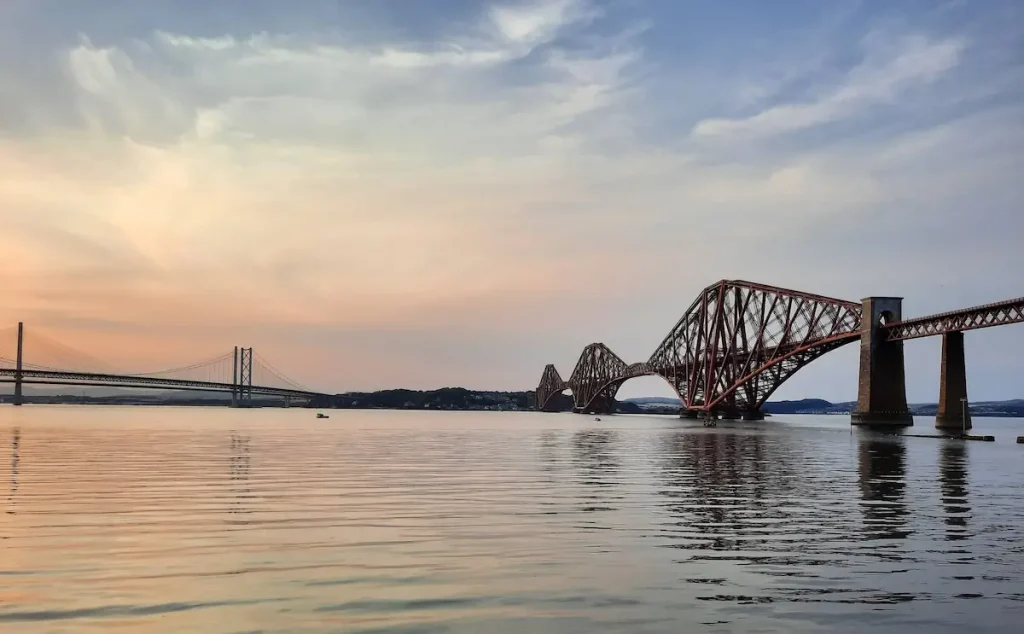
Nothing dramatic was happening when this frame settled. It was July, around 8:50 pm, at the end of the esplanade near Seal’s Craig. The light had thinned, the glare had eased, and the water finally stopped fighting the phone. Most people would have moved on.
| Time of day | Conditions | What you get |
|---|---|---|
| Golden hour 1 hour before sunset | Low directional light, water often settles | Warm tone on the red steel, reduced glare, and surface reflections that support the frame. |
| Dusk / last light | Natural light fading, bridge illumination beginning | A short window where artificial and natural light balance. Harder to catch, but worth waiting for. |
| Night full dark | Bridge fully lit, sky black, background gone | Clean, uncluttered structure against dark. Long reflections on calm water. The most reliable result. |
| Dawn / early morning | Same soft light as golden hour, fewer people | Possible mist over the Forth in autumn and winter. Empty foreground. Quiet water before the day starts. |
| Midday | High sun, hard shadows, bright water glare | Flat steel with little tonal range. Usually the weakest window, though sometimes unavoidable on a cruise day. |
| Overcast / mist | Diffused light, no direct sun, soft contrast | No glare, even exposure across steel and water, with mist adding depth. Better than it looks on arrival. |
Earlier, everything felt harder than it should. The steel looked flat – Forth Road Bridge and the Forth Rail Bridge framing the picture. The water broke the frame apart. Standing there felt pointless. Then the light softened without announcing itself, the surface smoothed, and the bridge started to hold together without effort.
This wasn’t about finding somewhere better. It was about staying put long enough for conditions to change. That’s usually when photographing the Forth Bridges starts to work — not on arrival, but in the quiet stretch when the place finally settles.
To plan your say in Queensferry and getting the best shots, the Queensferry walking tour helps you discover hidden gems worth photographing along the High Street.
What the Water Adds – or Takes Away
This was taken from the shoreline around 5:30 pm in September, when the light had eased and the surface finally settled. Earlier, the water was busy and reflective in all the wrong ways. Here, it’s calm enough to stop competing without turning the scene into a postcard.
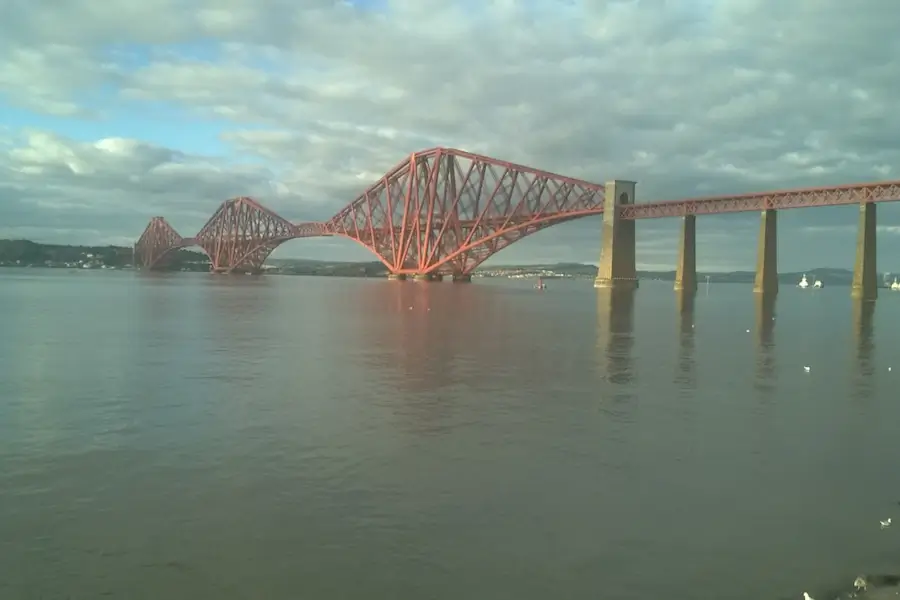
When the water behaves like this, the scale becomes readable. The steel of the red rail bridge holds together instead of breaking into fragments. Even with an unremarkable sky, the frame feels heavier and slower, closer to how the bridge actually looks.
That’s the part most people miss when photographing the Forth Bridges. Water doesn’t need to be dramatic. It just needs to cooperate long enough for the structure to carry the image on its own.
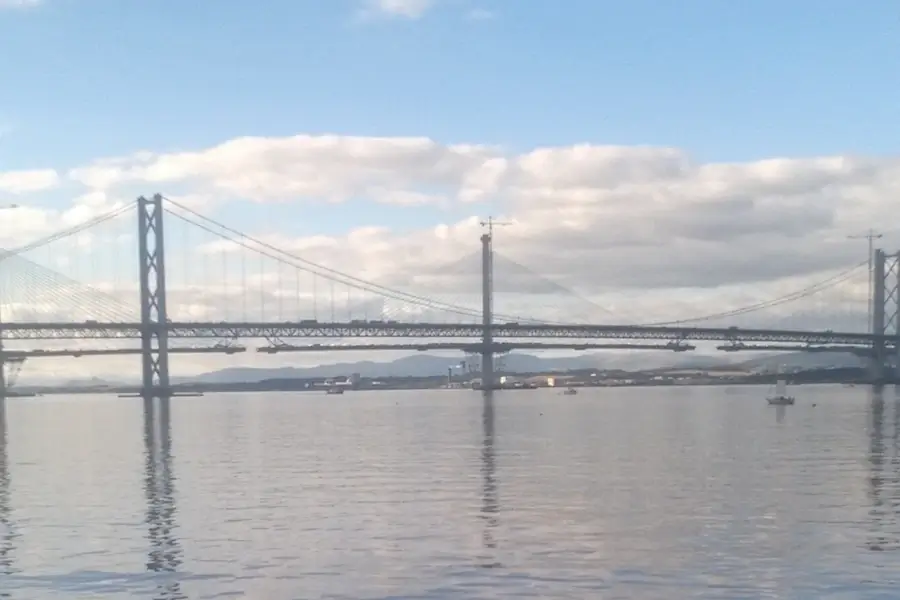
An hour earlier, everything looked fine on paper. The water was calm, the bridge clear, the light still holding. But the frame felt thinner. Less weight. The surface hadn’t settled yet – it was still reflecting everything instead of supporting the structure.
Mist and Low Cloud Are Not a Problem
Mist usually gets written off straight away. People see the bridge fading out and assume the photo’s gone. In reality, what drops first is distance and background noise. The far shore disappears. The sky stops competing. The frame gets simpler whether you plan it or not.

With low cloud sitting behind the spans, the steel of the cantilever railway bridge reads more clearly. There’s less glare, fewer layers, and less visual clutter. You’re no longer trying to balance water, sky, land, and structure all at once. The bridge carries the weight on its own.
This is why mist works here when it wouldn’t elsewhere. The Forth Bridges don’t rely on detail. They rely on shape and repetition. When the background falls away, those are the things that come through – and the photo ends up closer to how it actually felt standing there.
Why the Bridges Shrink on Camera
This is the point most people hit somewhere around the middle of town. You’ve got a clear view, plenty of bridge in frame, nothing obviously wrong – and yet the photo still comes back smaller than it felt. Long, yes. Impressive, maybe. But not heavy.

What changes in these shots is what the frame is doing. The road bridge isn’t floating in space anymore. The piers stack up. The water darkens. The underside cuts across the image instead of letting the sky wash everything out. There’s resistance in the frame, and the structure starts to press back.
This photo shows scale because the stone piers fill most of the frame. They’re tall, wide, and evenly spaced. The water sits low against them, so you see their full height. The steel starts well above the waterline and stays there.
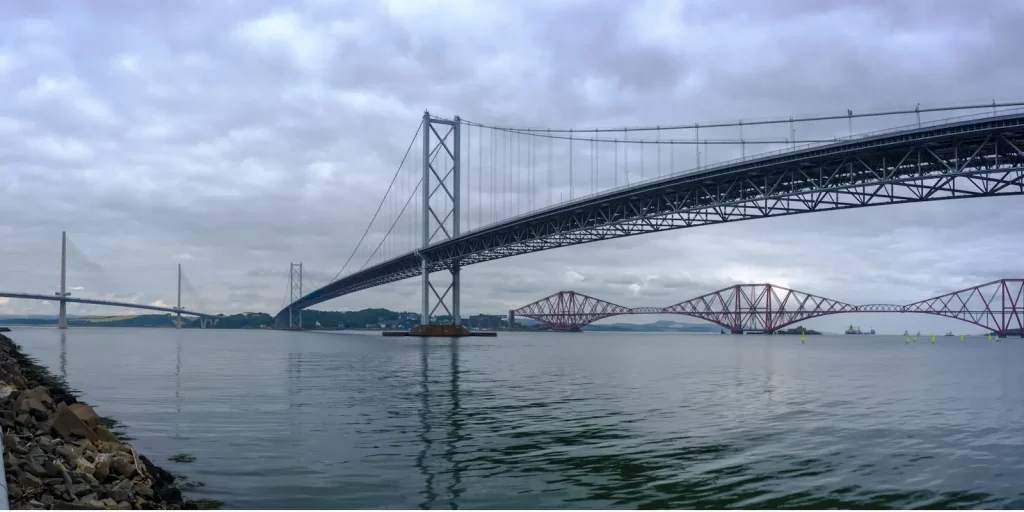
You can count how many piers are visible and how far they continue into the distance. Each one is the same size. The bridge isn’t just crossing the water here – it’s supported repeatedly, section by section, across the whole span.
Colour and Contrast Change with Angle
From level ground, the frame fills with similar tones. Grey water, stone buildings, pale sky. Everything sits close together, so the bridges blend into the background instead of standing apart. But some buildings along the High Street break the mould.

When the angle shifts with photographs from the terraced High Street, those layers separate. Land darkens. Water drops lower. Sky lifts away from the structure. The bridge colour stops merging with what’s behind it.
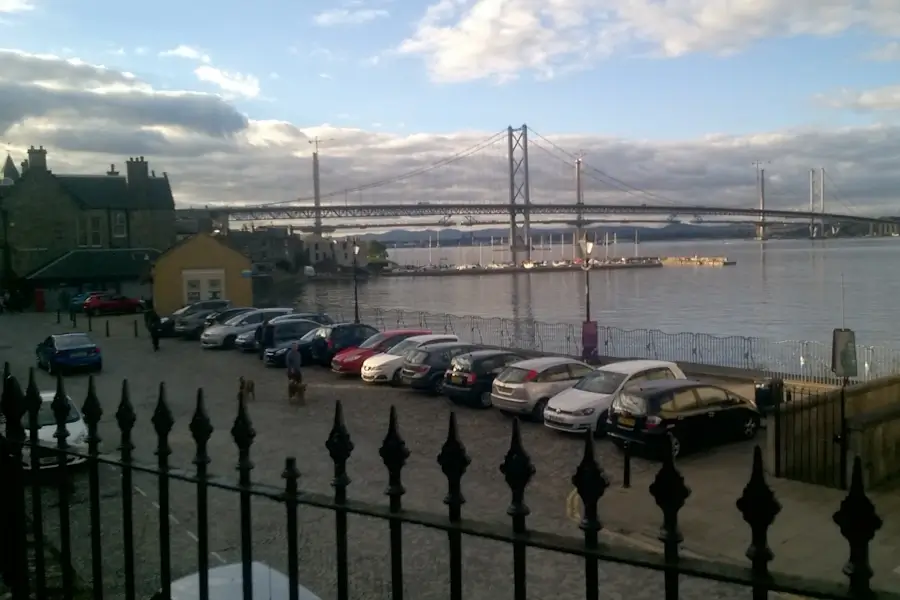
Nothing about the bridge changes. The colour is the same. The difference is how much of each surface you see at once. A small change in angle is often enough to break everything apart.
Along the High Street, you’ll also find plenty of things to do in Queensferry — from popping to the Ferry Tap for a pint, a snack in the Orocco Pier, or just relaxing at the harbour taking in views of all three bridges.
A Few Metres Higher Changes the Shot

Most cruise passengers and visitors to Queensferry stick to the High Street. And, yes, there are plenty of Forth Bridges viewpoints. The High Street is flat, obvious, and right in front of you when you arrive. Photos taken here usually sit low, with the bridge backed by water and sky, which thins everything out.
What’s easy to miss is how quickly the ground rises behind the street. Queensferry is steep by default. Within a short walk and climb behind the High Street, the angle changes, and the bridge stops floating over the Forth. You now get to see the three bridges – Forth Road Bridge, Queensferry Crossing, and Forth Bridge – from new vantage points.

From higher up, water almost drops out of the frame, and structure takes over. Nothing dramatic changes – just the angle. That’s often enough to turn a passable photo into a solid one.
Night Is the Shortcut Most Visitors Miss
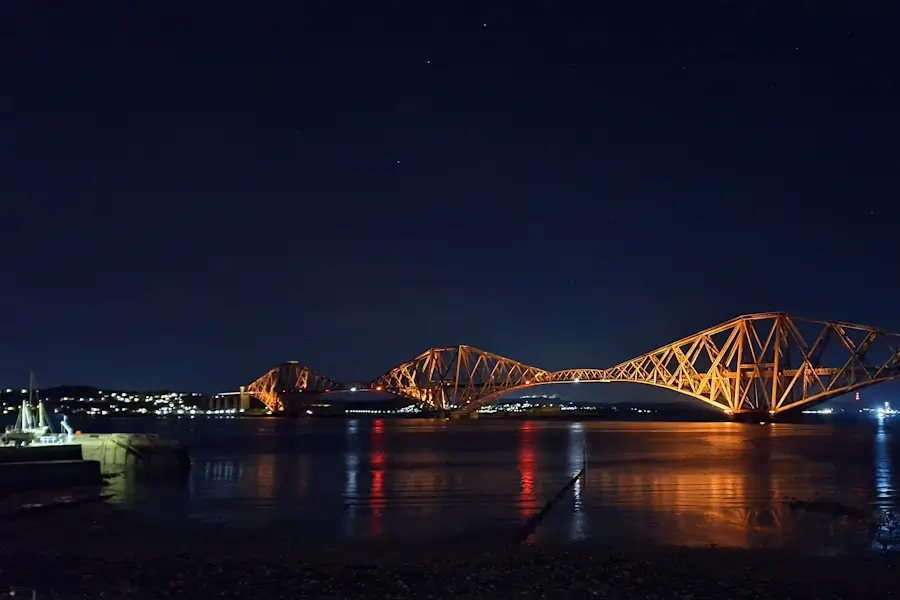
Nothing special was planned here. It was January, around 9 pm, properly dark, with the sky gone black and the air cold enough that most people had already headed off. The bridge lights were on and steady, highlighting the cantilever design. The water had turned into long reflections instead of glare.
In daylight, this same shot from the shoreline near the harbour isn’t nearly as dramatic. It’s the usual sky, water, and Forth Rail Bridge. But what you miss is the lights in North Queensferry and Fife and the colourful reflections on the Forth Estuary.
That’s why night works so reliably here. Not because it’s dramatic, but because there’s less to juggle. The bridge is lit, the background stays dark, and the photo stops fighting you.
My Queensferry Photos – What’s Happening and Different Angles

From the Forth Road Bridge looking back toward town, Queensferry spreads out low and wide. Houses sit tight to the shoreline. The bridges sit behind the town rather than above it. It’s an angle that puts scale into context instead of isolating the structure.
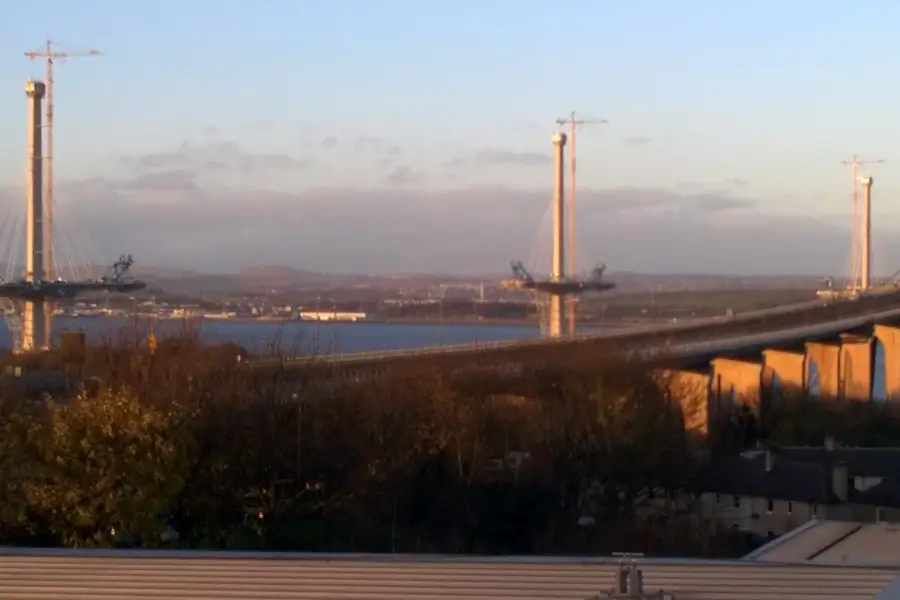
From higher ground looking across the Forth Road Bridge, the towers rise cleanly above the deck. You see the cables drop straight down instead of tapering away. The bridge reads vertically as much as horizontally from this angle.
Looking along the Forth Rail Bridge from close range, the red steel fills the frame. The spans overlap instead of stretching out. You don’t see where it starts or ends — just repeated sections stacked one behind the other.

Taken from the edge of town, with the post box cutting into the frame. The bridge sits beyond everyday street furniture rather than open water. It’s a reminder that some of the most useful angles come from ordinary places, not obvious stopping points. It’s one of the few remaining post boxes of the Georgian/Victorian era in Scotland.
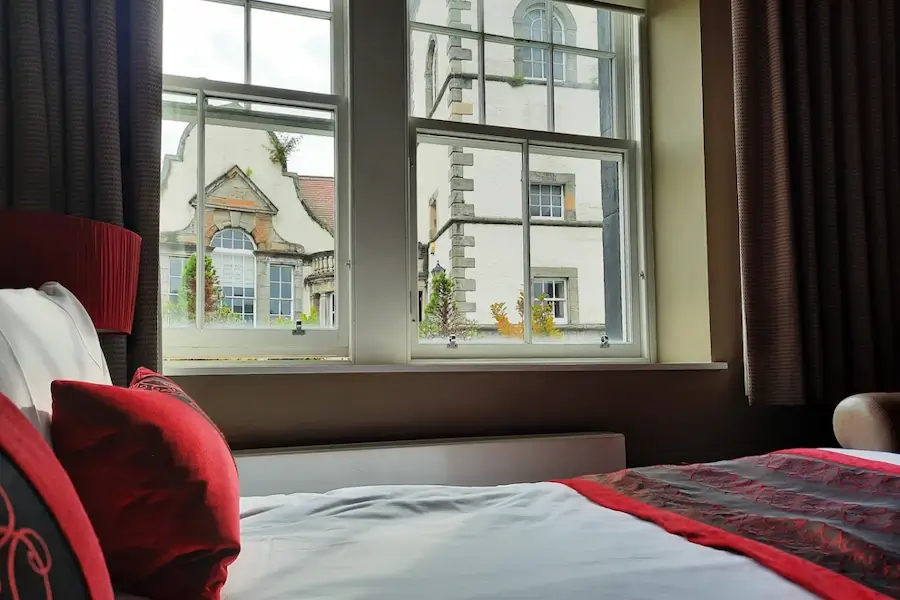
From Orocco Pier, the Tolbooth gives you a fixed foreground. You’re shooting through the town rather than past it. Stone, rooflines, then steel. The bridges sit behind something familiar and human-scale, which changes the whole balance of the frame without needing distance.
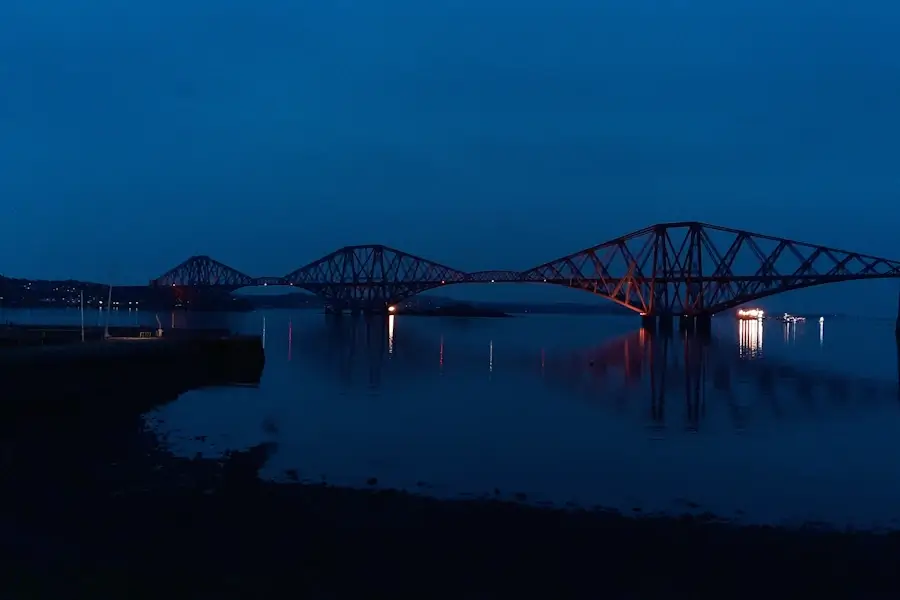
At night from the shoreline, the bridges sit low and dark against the water. Reflections pull downward rather than outward. The angle stays flat, but the frame simplifies because there’s nothing else visible beyond the structure and its lights.
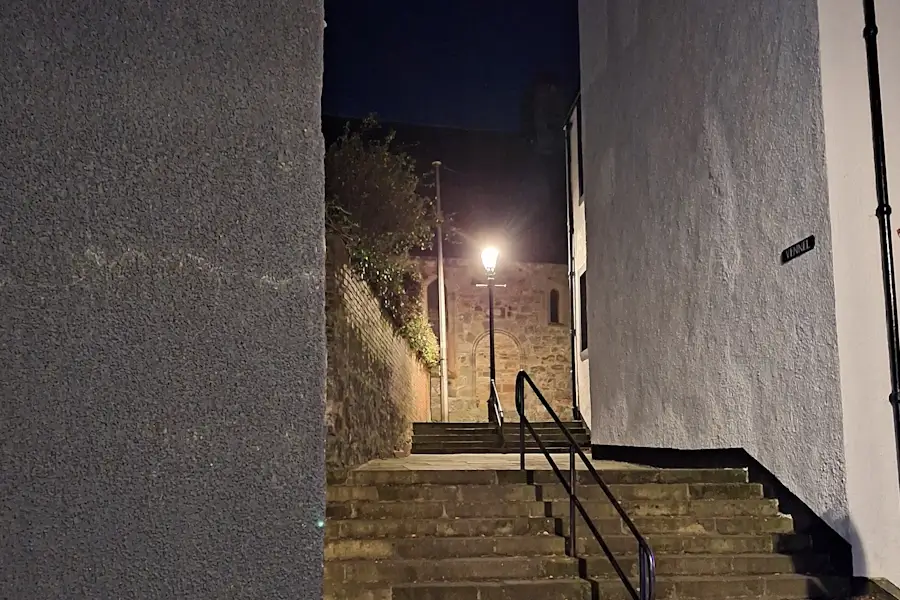
From a narrow lane or stairway at night, the view opens suddenly. Walls fall away, and the bridge appears at the top of the frame. It’s a compressed angle — vertical first, horizontal second.
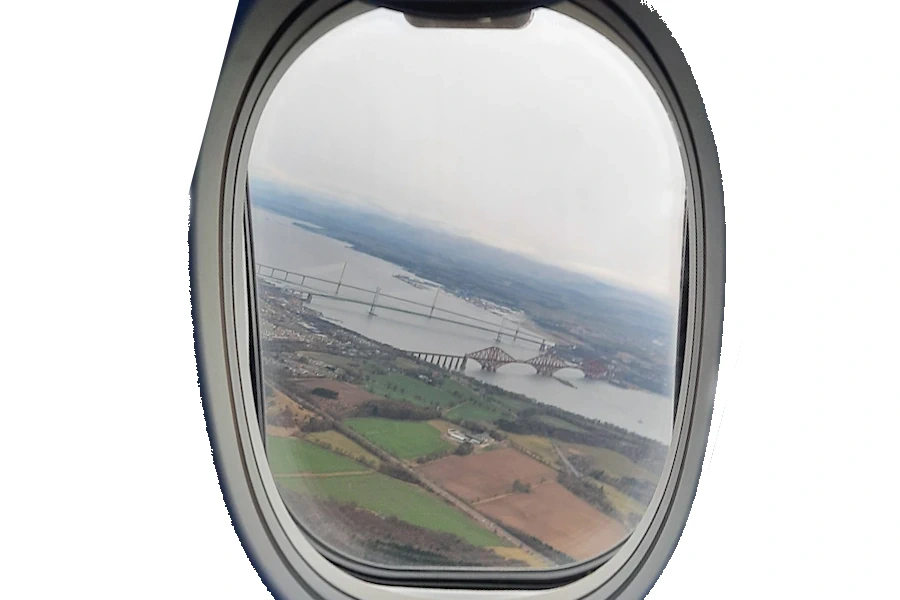
Coming into Edinburgh Airport, the angle flattens everything out. You see all three bridges together — rail, road, and the Queensferry Crossing — laid across the Forth in one line. It’s the only view where the full layout makes sense at once.
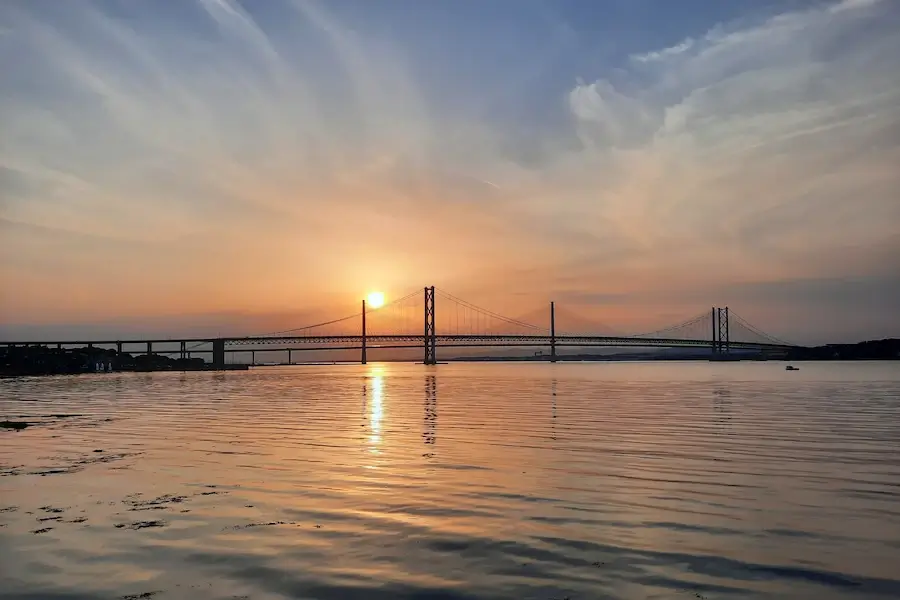
Sun setting behind the Forth Road Bridge, with calm water in the foreground reflecting the orange sky and bridge towers, seen from the shoreline in South Queensferry.
Phone and Framing Advice
A phone tends to make the Forth Bridges look smaller than they feel from the shoreline. The wide lens pulls in too much sky and water, leaving the steel structure sitting thinly across the middle of the frame.
Get the Phone Settings Right
- Clean the lens first. Harbour spray, fingerprints and pocket dust soften detail quickly, especially around bridge lights after dark.
- Start with the standard 1× lens. The 0.5× setting fits more into the frame but pushes the bridge further away. Use it only when standing close beneath the structure.
- Avoid pinching the screen to zoom. Digital zoom removes detail from the steelwork. Move closer or use one of the phone’s fixed optical settings instead.
- Tap the bridge to set focus and brightness. If the sky or water looks washed out, drag the exposure control down slightly until the red steel and clouds regain detail.
- Steady the phone after dark. Rest it against a railing or solid surface and use the timer if available. Night mode needs a still phone more than it needs an expensive one.
Frame the Bridge Without Shrinking It
Turn on the camera grid and use the bridge deck or horizon to keep the frame level. Even a small tilt becomes obvious across a structure this long.
Give the bridge something familiar to sit beside. A boat, railing, person, Tolbooth tower or waterfront building provides scale; empty sky and open water usually make the structure look smaller.
Use landscape orientation for the full span or all three bridges together. Portrait orientation works better beneath Hawes Pier, where the stone piers and steel rise vertically above you.
Do not force the entire bridge into every photograph. A close section of cantilever steel, repeated stone piers or one tower disappearing into mist can show its scale more effectively than another wide shot from the shoreline.
If reflections are the subject, give the water enough room to matter. If the structure is the subject, reduce the foreground and let the bridge carry more of the frame.
Queensferry doesn’t need planning to photograph well. It needs a bit of attention. Most of the shots that worked here came from noticing what had already changed — light settling, water calming, or the angle shifting slightly.
You don’t have to chase anything. The bridges are always doing something. If you catch them at the right moment, the photo tends to look after itself.
Forth Bridge Photography: FAQs
What’s the best time of day to photograph the Forth Bridge?
The hour before sunset is the most reliable window — low, directional light warms the red steel and glare drops off as the sun lowers. Full dark is the close second: the bridge is illuminated, the background disappears, and exposure is far easier to manage than in daylight. Midday is the one time to avoid — flat light, hard glare off the water, no tonal range in the steel.
Is the Forth Bridge lit up at night, and is it worth shooting after dark?
Yes. The Forth Bridge — the Victorian rail bridge specifically — is illuminated after dark, and it’s one of the most reliably photogenic conditions on offer here. The lighting picks out the cantilever framework clearly, and on a calm night the reflection carries across the Forth toward North Queensferry.
Does the tide affect Forth Bridge photos?
It changes what’s in your foreground. At high tide the water sits closer to the shoreline viewpoints, giving you reflections and a cleaner water-to-steel composition. At low tide the water pulls back and exposes the shore — less reflective, but useful if you want foreground texture rather than open water. Check tide times before you go if the shot depends on it.
Can you get train light trails on the Forth Bridge at night?
Yes, and it’s one of the more distinctive shots available here — most visitors don’t think to wait for it. A long exposure timed to a train crossing the rail bridge after dark turns the train into a light trail against the illuminated steel. You’ll need a slower shutter speed than a typical handheld night shot, so a tripod or a stable surface matters more here than anywhere else on this page.
Do you need a tripod or special equipment to photograph the Forth Bridge?
Not for daylight or golden hour — a phone or handheld camera is fine. For night shots, long exposures, or the light-trail shot above, a tripod (or at minimum a flat, stable surface) makes the difference between a sharp result and a blurred one, since shutter speeds slow down considerably once the light drops.
Can you see all three Forth bridges together in one photo?
Yes, from a handful of specific spots — the elevated ground works best, since street level tends to flatten the three structures into one overlapping mass. For the exact viewpoints that give you the layered shot, see the best viewpoints in Queensferry guide.

Scott Gibson grew up in South Queensferry and runs queensferry.net. The Forth and Edinburgh guides come from lived experience — tender days at Hawes Pier, cruise traffic, the shortcuts into the city. For the wider Scotland cruise ports, he draws on friends in some of the port towns alongside port, operator and transport sources — so the detail holds up on the ground, not just on paper. Clear directions, real timings, no brochure fluff.